Favorite games and familiar programs cannot be replaced with new ones. When Microsoft releases a new OS, compatibility between programs from previous ones is a feature that developers think about first. But sometimes trying to start the old one results in an error. Are Microsoft employees really that careless about their jobs?
No, the fact is that for outdated software it is recommended to enable compatibility mode, which by default does not work 100%How to run old software on a new OS
Despite numerous changes in Windows 8.1 and 10, they support programs for XP and 7 with rare exceptions. Windows 8 compatibility problems do occur, but this is 1 case out of 100. Similar things happen with applications for XP and OSes released earlier. The problem encountered is the inability to launch an old game.
What is compatibility mode? If the software or 3D toy was made for win2000, then it probably won’t work on Vista. The point is the different OS structures. Software is created to work in a specific environment. When it gets into an unfamiliar one, it does not start or functions with errors. Windows compatibility is a way to “slip” into an application data from the old OS that is present in the new one. But sometimes the need to launch such functionality is unfounded.
Software under development regularly receives new installers. There is no point in running an old antivirus on eight or ten when it has already been updated 10 times. So first check if there is a new “build”. The exception is for programs whose previous releases contained useful functions that, for some reason, were not implemented in updates. In order for the old application to work correctly in the new OS and without failures, it is recommended to set the compatibility mode. This is not a special program for launching old games or software: everything is implemented using standard Windows tools.
Outdated programs and games in G8 (or 8.1)
How to make the game compatible with Windows 8? Do you have a retro game lying around or an old program that has no worthy analogues, but it does not start or is “buggy” on the “eight”? Running old games on Windows 7 or 8 can be made stable. To do this, right-click on the shortcut and call up the context menu. Pay attention to the “Properties” item. Launch and select the Compatibility tab.
This window provides the necessary parameters to help ensure compatibility on Windows 8 for legacy applications.Running old programs on Windows 7 will be easier if you know for sure what OS your game was released for, then for the “Run the program in compatibility mode for...” option, select this operating system. According to statistics, 90% of applications that conflict with Windows 8 and 8.1 work without problems in compatibility with XP Service Pack 2 or 3. Select the desired option, click “Apply” and “OK”. If it doesn’t start the first time, try other options, don’t forget to click on the “Apply” button.
If you are wondering how to disable compatibility mode in Windows 7, then simply follow the above steps in reverse order. But this is just a basic setup. The “Compatibility” tab in the application shortcut properties also offers advanced settings:
- low color mode;
- lowering display resolution;
- Disable image scaling for modern screens.
Color reduction
Games and applications for legacy operating systems were created to run on computers whose monitors had an image resolution of 640X480 or 800X600 pixels. Modern video cards and monitors offer resolutions of up to 2000-3000 pixels. You need to configure Compatibility View settings. It is recommended to run such software in color. By activating the mode, you will run the program at the resolution for which it is intended. In the “Compatibility” tab, check the box next to the corresponding item and select the appropriate color option - 8 or 16 bits.
Using a different screen resolution
Old games were created for screens with a resolution of 640X480. This resolution is supported in modern monitor models, but is not used. Sometimes the Windows 7 compatibility problem lies precisely in the stretched image.
To run old games on the new OS, apply the “Use screen resolution 640X480” optionDisabling picture scaling
If a computer program or video game was intended to run on monitors 10-20 years ago, on new displays they are distorted - the image is stretched and blurred. To prevent this from happening, check the box next to “Disable image scaling...”. Now the picture looks correct.
Is there a completely incompatible Windows 7 application? Not often. It is not recommended to use compatibility mode for the following applications:
- antiviruses;
- garbage cleaners;
- hard drive utilities;
- tweakers.
This is a risk of compromising the stability of the OS.
Automatically apply settings
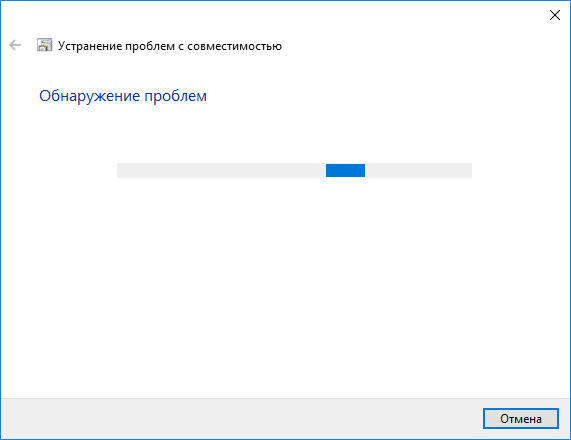
Windows contains special software that determines the appropriate correct launch mode for outdated applications and games. This is a good test of compatibility with Windows 7, 8 or 10. To launch, use the context menu of the installer file. At the top, click on the line “Fix compatibility problems”.
A new window will open, offering two options: using recommended parameters and diagnosticsThe first point is fine. Select: A new window will open showing suggested options for the program to start correctly. The “Test program” item will help you test the proposed parameters in action. Clicking the button will launch the application with these parameters. If OK, save the result. Now the application automatically launches as it should, with the necessary options.
The diagnostics item helps you select options for correct launch, based on problems with the application.
By editing the registry
You can enable Windows 7, 8 or 10 compatibility using the registry. This method is used in rare cases, as there are plenty of other methods. For curious users, to run the game in compatibility mode or a legacy application:
- Click on "Start".
- In the “Run” field, enter cmd and press Enter.
- In the command prompt window that opens, type regedit and Enter.
- Right-click on the empty space on the right half of the window and select “Create”.
- Here, choose to create a “String Parameter”.
- The parameter name is the full path to the executable file of the program for which you are setting up compatibility with Windows 7, for example.
- Now right-click on the parameter name and open “Edit”.
- In the “Value” line, enter one of the proposed options:
- WIN7RTM - to install compatibility with the “seven”;
- VISTARTM - for Vista;
- VISTASP1 - Vista with Service Pack 1;
- VISTASP2 - Vistas with Service Pack 2;
- WINXPSP2 - for "expi" with service pack 2;
- WINXPSP3 - "ex pi" with service pack 3;
- WIN2000 - for Windows 2000;
- NT4SP5 - for Windows NT version 4;
- WIN98 - for Windows 98;
- WIN95 - Windows 95.
- Do you intend to open the program in compatibility mode with administrator rights? After the selection above, add the word RUNASADMIN (separated by a space).
- Now find the branch HKEY_LOCAL_MACHINE\Software\Microsoft\Windows NT\CurrentVersion\AppCompatFlags\Layers.
- Repeat steps 5 - 10 for this branch.
- Save and restart your computer.
Now you know how to enable compatibility mode on Windows 7, 8 10.
WATCH THE VIDEO
If the computer is used by two or three or another number of users under separate accounts, it is recommended to apply program compatibility settings for “accounts”. Otherwise, if you boot under a different login, you will have to configure it from scratch. To do this, log into the OS under an administrator account. Applying compatibility mode using the first method (in the shortcut menu), apply the “Change settings for all users” item. Now the program runs with the same characteristics on all accounts.
Users are faced with cases when outdated software does not start after the manipulations have been done and no program for game compatibility on Windows 7 helps. But this does not mean that there are no chances to use a “prehistoric” program or play a retro game. What to do? Answer - ! This is a program that creates an environment for running an OS within an OS. On Windows 10, you can run Windows 2000 or XP and install the application or toy of interest in a virtual machine in its native environment. An example of a virtual machine is the Virtualbox program. This method is reliable and guarantees full compatibility. For trouble-free operation of the virtual machine, you need a PC with advanced technical characteristics.
Every time you launch an application, the operating system launches the Compatibility Assistant by default. This service monitors the running program and tries to determine if there are previously known compatibility issues with the installed operating system. Compatibility mode is also intended for installing and running programs that were written for earlier versions of operating systems. For developer reasons, this can help avoid a lot of problems. The compatibility mode is designed mainly for beginners. If for some reason you are tired of pop-up windows asking you to run this application with special parameters, the article tells you how to disable compatibility mode in Windows 10. Please note that all actions are intended for experienced users or administrators.
Description of why this service from Microsoft is needed: “Provides support for the Program Compatibility Assistant. It monitors programs that a user installs and runs and detects known compatibility issues. If you stop this service, the Program Compatibility Assistant will not work correctly."
Disabling Compatibility Assistant
Step 1: Press the key combination “Win+R” and in the Open field: enter services.msc and click "OK".
Step 2: Team services.msc you launch the service management window. Scroll down the list and find “Program Compatibility Assistant Service” in the list. Right-click on this service and select “Stop” from the context list. This operation allows you to stop the service until the next Windows restart.

Click Stop to temporarily disable Compatibility Mode
Step 3: A window will appear for a while notifying you of an attempt to stop this service. If everything went well, the “Running” message will disappear next to the service name. This means it has stopped.

Step 4: To avoid waiting for a reboot, you can manually launch the Program Compatibility Assistant. In the same window, right-click on the service and select “Run” from the list. Just like in the previous case, a launch window should appear for a while and if everything is fine, the words “Running” will appear opposite the name.

To start the Compatibility Service, click on “Start”
Step 5: If you want to completely disable Windows 10 Program Compatibility Mode, you need to run Properties. To do this, either double-click with the left mouse button or right-click and select “Properties” from the list. In the “General” tab, select the startup type “Disabled” and click “OK”. This will completely disable the Compatibility Service and even after a reboot it will not start. To re-enable it, follow the same steps and select “Automatic” as the startup type.

Compatibility Service Properties - Disable Compatibility Completely
Run the program in compatibility mode manually
Step 1: If the program you are running does not work as it should, you can try to specify in the compatibility settings the mode with which you think the program or application should work. To do this, right-click on the program or shortcut and select “Properties”.

Step 2: Go to the “Compatibility” tab and in the “Compatibility Mode” field in the drop-down list of parameters, specify the type of operating system. To make the list available, check the “Run this program in compatibility mode for:” checkbox.

Step 3: Additionally, in this tab you can specify launch parameters. The main thing is the ability to once tell the program to run as an administrator. Convenient if any functions do not work during normal startup.

Step 1: If the manual method of specifying compatibility does not work or you do not know which type to specify, Windows has a built-in utility for determining the mode in automatic mode. For the utility to determine the mode, you must launch the program for execution with this utility. To do this, right-click on the application or shortcut and select “Fix compatibility issues” from the list.

Step 2: The utility will launch the application and try to identify launch problems.

Step 3: Select the diagnostic mode “Use recommended settings”.

Step 4: In the window you will see automatically configured startup parameters. Before continuing, run the program and check its functionality by clicking on the “Test program...” button. The application will launch. After checking the functionality, click the “Next” button.

Step 5: If the application works fine and the problem does not occur again, click on the “Yes, save these settings for the program” button. The utility will use them to launch in this mode for subsequent launches. 
You can write any questions about the problem or suggestions at the bottom of the article.
As soon as the user starts the program, the OS automatically turns on the Compatibility Assistant. It is designed to improve system performance, but on devices with minimal technical parameters, one more running utility will cause a crash or slow operation (how to increase PC performance is described in the article “”). Therefore, if you want to speed up your computer, read how to disable compatibility mode in Windows 10.
Shutdown
Windows Compatibility Assistant is designed to track:
- programs installed on the computer (read how to remove a program from a PC in the article “”);
- failures that occurred previously during application operation;
- ways to solve emerging compatibility problems.
It is also designed to run applications written for earlier versions of the OS. But if you don't want to constantly see messages on your PC asking you to install an app with recommended settings, disable this feature.
Using the Services
In Group Policy
- Press Win+R and enter the command: gpedit.msc.
- Computer Configuration → Administrative Templates → Windows Components - Application Compatibility.

- On the right side of the window, find “Disable Program Compatibility Assistant” → RMB → Change → Enabled → confirm changes → restart your PC.

In OS Configuration

Manually launch applications in compatibility mode
RMB on the launch shortcut → properties → “Compatibility” tab.
There are three options available here:
- click the “Run Compatibility Troubleshooter” button - the system will automatically try to solve the problems;

- in the “Compatibility Mode” block, check the box “Run the program in compatibility mode for” and select from the drop-down list the OS in which the application worked stably;

- in the “Parameters” block, specify the values with which the program will be launched in compatibility mode - save the changes.

Good to know! To make the changes made for each user on the computer, click the “Change settings for all users” button (Administrator rights are required).
The video describes the manual start process more clearly.
Automatic parameter detection
- To start automatic setup, you can also right-click on the shortcut to launch the program - Fix compatibility problems.
- After diagnostics, windows will appear with two options for troubleshooting:
- use recommended parameters;
- program diagnostics.
- Select “Use recommended settings” to automatically configure the program → the utility will offer to check the functionality of the application with the changes made.

- Launch the application and check its functionality → Next.
- The utility will ask if the problems with the application's performance have been resolved → select one of the proposed options.

Conclusion
If a program stops working on Windows 10, use the Compatibility Assistant to start it. If necessary, it can be disabled. But it is not recommended to do this if it does not interfere with the operation of the computer.
It gives the impression of a radically new operating system - just look at the version number, which differs from Windows 7 by three digits. And all the pre-installed applications are new “universal” ones, not traditional desktop ones.
However, those who need traditional desktop programs need not worry. Don't let the unfamiliar design of Windows 10 scare you: if an app worked on Windows 7, it will almost certainly work on Windows 10.
Inside the system is similar to Windows 7 and 8
Yes, you can run traditional desktop programs on Windows 10. In terms of its internal structure, Windows 10 is very similar to Windows 8, and that, in turn, to Windows 7. The application security model and driver architecture have not changed radically - there is no such difference as between Windows XP and Windows Vista or Windows 7.
In other words, if an app works on Windows 7 or 8, it will almost certainly work on Windows 10. Yes, Windows 10 has an entirely new app model, but traditional desktop programs can run in parallel with these new "universal" apps.

Windows RT is no more
Microsoft abandoned development, so even on the Microsoft Surface 3 you can use desktop programs, although you could not yet use the Surface 2.
16-bit applications - that is, any programs from Windows 3.1 - will not work on 64-bit versions of Windows 10. They work in 32-bit versions of Windows 7, so if you can’t do without using 16-bit programs, install the 32-bit version of Windows 10. In general, with Windows 7 things were exactly the same - in 64-bit versions of the system 16-bit applications did not work. When you try to run a 16-bit program on a 64-bit version of Windows 10, you receive a message saying that it is not supported on your computer.

How to check application compatibility
Microsoft has an Update Assistant that scans the system and reports any incompatible programs and devices. This assistant is built into the Get Windows 10 app, which was automatically installed on all Windows 7 and Windows 8.1 computers through Windows Update. Click on the application icon in the taskbar and run a compatibility check.
If you have important business applications or other essential programs, try checking with the software company to see if they are compatible with Windows 10. There shouldn't be any problems if they worked on Windows 7 and 8.
If you can't do without these apps, you can wait a few weeks to upgrade and see if they work for other users on Windows 10. After all, there's no need to rush to upgrade—it'll be free for a full year after Windows 10 releases.

Windows 10 is not compatible with some legacy Windows built-in programs. For example, it does not work with Windows Media Center, which could still be downloaded for a fee for Windows 8. Traditional desktop versions of the built-in games - Hearts, Solitaire and Minesweeper - are included in the system excluded, but there are modern "universal" versions of the last two. There is no built-in DVD playback feature, but you can install something like VLC Player instead. Desktop mini-applications (gadgets) have disappeared forever, but this is not so bad - they could not boast of reliable data protection.
| Materials |
Windows Compatibility Mode allows you to run programs on your computer that ran in previous versions of the operating system. With the release of a new operating system, some programs experience problems: the program starts with an error, the application cannot work, etc.
Changes made to new versions of Windows make it impossible to use some programs in this version of the operating system. Not all programs are supported by developers for a long time.
Many programs work fine on your computer for many years, even after support has ended. Due to changes in the Windows code, the application loses functionality in the new OS version. There is no one to rewrite the program code according to the requirements of the new version of Windows, because the developer has stopped supporting the software. Therefore, a way out of this situation is necessary.
Compatibility mode in Windows will come to the rescue. Running in compatibility mode will allow you to run many older programs on your PC that work fine on older versions of Windows.
Windows Program Compatibility Mode is launched in two ways:
- from a program property or shortcut for all versions of Windows;
- by using .
In the first case, the user right-clicks on the shortcut of the problematic program, or on the executive file (.exe) of the application. The second method involves using the system troubleshooting tool.
Keep in mind that some programs will still not work normally after being turned on in compatibility mode for various reasons. In most cases, old applications will still be able to run on the computer.
In the instructions on this page, I will show the compatibility mode in Windows 10. In other versions of Windows (Windows 7, Windows 8, Windows 8.1), setting the compatibility mode of older programs with the version of the system installed on the computer works in a similar way.
How to launch a program in compatibility mode from the shortcut or application properties context menu
If the program refuses to work in the new version of the operating system, you should try to fix the problem using the built-in compatibility mode in Windows.
Right-click on the program shortcut or executive file. If there is no application shortcut, then find the file of the program that does not start on your computer. Programs are usually installed on the system disk, depending on the bit depth, in the Program Files or Program Files (x86) folders. In very rare cases, programs are installed in the user profile location:
C:\Users\Username\AppData\Roaming
In the locations, look for the program folder by the name of the application, or by the name of the manufacturer of this software. Find the program you need, and then right-click on the application file.
Please note: in Windows 10, you cannot always use the object properties context menu because the system sometimes does not show the corresponding tab for a specific application, so try another method.
In the context menu, click on the “Properties” item.
In the “Properties: application name” window that opens, go to the “Compatibility” tab.
Here, you can immediately run the Compatibility Troubleshooter using the Run Compatibility Troubleshooter button, or select the appropriate options manually.
To do this, activate the “Run this program in compatibility mode for:” setting, and then select the version of Windows in which this application worked normally.
Adjust additional settings for color, screen resolution, and scaling (these settings may not work on 64-bit systems).
If necessary, check the box next to “Run this program as an administrator.” Some applications require elevated administrative rights to operate.
Here's a real-life example: In Windows 10, you can't install Skype for desktop on your PC. After starting the installation of the program, you will be prompted to download the Skype for Windows 10 application from the Microsoft Store (these programs are different from each other). The only option left is to install Skype for desktop in compatibility mode with Windows 8.
After completing the settings, click on the “OK” button. Check the program in compatibility mode.
How to run Compatibility Mode using the Windows Troubleshooter
Program compatibility mode in Windows 10, Windows 7, Windows 8, Windows 8.1 can be launched using the built-in system tool.
To do this, right-click on the shortcut or program file, and in the context menu, click on the “Fix compatibility problems” item.

The second way is to launch the tool from the Control Panel, after selecting “Troubleshooting”. In the Troubleshoot your computer window, click the Run programs designed for previous versions of Windows link.

There is a third way in Windows 10: launch the Settings app, go to Update & Security. Next, open the “Troubleshooting” section, scroll down the list of problems to the “Troubleshoot compatibility issues” option, click on the option, and then click on the “Run tool now” button.

Users of Windows 7, Windows 8, Windows 8.1 can additionally use the Microsoft Easy Fix tool (the tool is built into Windows 10), which performs the same functions, which must be downloaded to your computer by selecting the corresponding problem on the Microsoft website page. Read more about this.
Troubleshooting compatibility issues in Windows
If the tool is launched from computer management tools rather than from a specific program file, then the user will need to select the program that has problems starting, installing, or operating.
After you run the troubleshooter, it automatically searches for compatibility issues on your computer.
In the next window you need to select a diagnostic mode. There are two options to choose from:
- “Use recommended settings” - test run the program with recommended compatibility settings.
- “Program diagnostics” - selects compatibility parameters based on noticed problems.


Test the program and then click on the “Next” button.
In the final window, you need to select the appropriate answer to the question about how to fix the problem:
- “Yes, save these settings for the program.”
- “No, try using other parameters.”
- “No, report this problem to corporate and find a solution online.”

When selecting the “Program Diagnostics” option, the user will be able to offer the troubleshooter specific options for the problems noticed.
In the “What problems have been noticed?” window. You must select one or more of the most suitable options:
- “The program worked in previous versions of Windows, but will not install or run.”
- "The program opens but displays incorrectly."
- “Additional permits are required for the program.”
- "I don't see my problem on the list."

In the window “Which version did the program work with?” select one of the suggested versions of the Windows operating system.

If the problems noticed are not on this list, the system tool will prompt you to answer clarifying questions.

You will then be prompted to test the program using the recommended parameters for your system selection.
After checking, in the final window of the tool, answer the question about how to resolve the problem. If the program still doesn't work, try all possible options.
If necessary, you can program for a single application or for the entire system.
Conclusions of the article
Windows compatibility mode allows you to run an old program in a new version of the operating system. You can use an operating system tool to fix program compatibility issues on your computer.